Today I'm back with another review for Valken and this time it's for the Sniper and DMR fans amongst you! In this review, we're going to be looking at the V Tactical Scope 1-4x20 w/Mount Mil Dot Reticle (it's a mouthful, but bear with me!)
The V Tactical Scope is a compact 4x zoom scope with an etched glass reticle that has a 20 moa circle plus 3 moa dot that is specifically designed for airsoft use. It has two colour illumination - red and green for a better contrast in low light conditions as well as a high-quality lens to give the user a crystal clear view picture of his/her targets. Along with these features that promote clarity of vision, the sight is built to last - it has a 1-inch one-piece body tube that is waterproof, fog proof (as it is Nitrogen-filled and O-ring sealed) and shockproof - meaning it is perfect to withstand the stress of an airsoft skirmish!
The scope comes packaged with a one piece offset scope mount and it is powered by a standard CR2032 battery that is also included in the box. It also comes with a yellow tinted lens cover which serves a couple of purposes - it helps alleviate glare on bright game days, giving you a clearer sight picture and also, brightens surroundings in low light.
For my product review tests, I put the V Tactical Scope on the Ares Amoeba Striker sniper rifle with a standard barrel. As the sight is really compact and lightweight, with its full length measuring in at just 9.5 inches, it is a great scope option lighter sniper rifle set-ups and also for shorter sniper rifles and DMR but as you can see it doesn't look out of place on a standard sniper rifle.
As a complete sniper rifle/scope newbie (I've shot an airsoft sniper rifle maybe 4 times in my 3 years in airsoft) when I got this out of the box, I actually put the scope on the rifle backwards and the internet gave me a good ol' roasting for it - embarrassing, but I didn't know any better and no one is an expert in everything. After this little hiccup, I called in some of my sniper friends and did a little crash course of sniper rifles and scopes. I learned how to properly zero the scope in, when you would use each illumination setting (i.e green is better for low light use) and got to give it a good range test. After giving this scope a thorough testing, I found it is perfect for airsofters who want a no-fuss scope, as (once it's on the right way lol) it's easy to set up, operate and mount.
One thing I really liked about it, is as it is so compact it doesn't add a lot of weight to the rifle either so running it on a sniper rifle for extended MilSim games wouldn't be too much of an issue. The scope also boasts 4.5-5 inches of extra-long eye relief so it is comfy to use for an all-day skirmish as well.
It is really easy to attach and set up - just undo the screws and mount it onto your rail system and adjust the elevation and windage screws accordingly. One aspect that I really like about this scope, in particular, is that you don't need any tools to adjust them - it can all be done by hand, which is super handy if you need to readjust it quickly on the field.
The scope retails for $79.95 (which is around £60 at the current exchange rate) and is available from the Valken website.
So today I’m back with another review for Valken and in this review I’m
going to be testing their Profit SC paintball mask! Now I know a lot of you out
there hate everything paintball, but hear me out! Whilst I was in the States I
used a paintball mask whilst playing CQB as the FPS limits were a fair bit
higher than ours in the UK and it was comfy, didn’t fog, gave me good vision
and kept my face protected. Now although I have never been a huge fan of paintball
masks, using one did change my mind so I am open to trying different models.
Let’s first talk about the specs: the Valken Profit SC has an extreme
vision, fog resistant thermal lens that features a scratch resistant coating. The
lens has a patented quick change lens system and there is also a “Snap Click”
replaceable triple layer face foam system. The mask has a fully adjustable dual
head strap which keeps the mask secure on your face, and a comfort fit chin
strap for improved fit / safety, although honestly, I can’t really tell what
difference this makes when the mask is on.
I wore my Profit
mask for a game day of hard hitting CQB at a local airsoft site to test a
number of things – vision, fogging, cheek weld, fit and overall protection. In
regards to fit, I have a very small head and the dual head strap adjusted
enough to give me a secure fit – with no wobble or movement whilst I was
running around. For overall protection, I really rate it – I actually think
these masks provide a level of confidence in CQB as you know if you pop your
head around the corner being shot won’t hurt/cause any damage.
What was the cheek
weld like? This is my only gripe with paintball masks, you can’t quite get the
cheek weld you get with a half mesh face lower. Although you don’t really need
to use a RDS in super close CQB it is nice to have that sight picture. The
sides of the mask are more flexible and do allow for manipulation just not
enough for me to use my RDS as I usually would.
Did it fog? I ran
the mask for most of the day as is and there were no signs of fogging which is
awesome! This is one of the main reasons why I like wearing one. Just out of
curiosity however I did put the rain vent cover over the vents at the top of
the mask and ran it for a game and it did start to fog – not too much but
enough to impede my vision slightly. So my advice would be unless it’s really
heavy rain, give the vent cover a miss.
The Profit SC mask
is available from the Valken website for $99.95, which works out to about £76. It
is available in 3 different colour ways – blue, black and red. I opted for the
black colourway as it’ll go with more of my loadouts.
So I’m back with another review, and this time it’s a
review for Gunfire.pl! Today we’re going to be looking at one of the new CORE™ AEGs from Specna Arms - the SA - C04. The CORE™ range of replicas have been designed to be tough,
lightweight and more affordable for both beginners and seasoned
airsoft players alike.
For the new CORE™ range, Specna Arms decided to use
more polymer in their construction to make them not only lighter but also more
affordable. So let’s breakdown what’s what! The receiver, stock slide, stock
and the pistol grip are all made from a super tough fiber-glass reinforced polymer.
Whilst the barrel, RIS handguard, flash hider, enlarged charging handle and
sling points are all made of metal. As well as other parts including the
screws, pins, shell ejection window and mock bolt carrier.
As for
aesthetics, it has a classic M4 look and features a 22 mm top RIS rail, a RIS handguard and
an adjustable stock with a textured butt pad. The top rail has a flip-up rear
sight and a fixed front sight. It has a
standard flash hider that has a 14
mm left-handed thread. The receiver also bears some pretty cool markings
and a serial number.
What about the
internals? The gearbox contains 8
mm slide bearings and shimmed steel gears. The system has four anti-reversal latches. It also features a piston made of
polycarbonate polymer that it is equipped with a full steel strip, a type 1 cylinder and a steel circuit-breaker and a precise rotary Hop-Up chamber which makes changing
the hopup really easy.The replica also
features the CORE™ quick change spring
system which enables you to quickly change the power of the gun by
swapping out the spring without any special tools – the spring can be changed
by removing the stock slide, and then using a long screw driver. Out of
the box, I chrono’d the replica at 378
FPS, which is around our legal limit and definitely higher than the 350 FPS
site limits but Specna Arms provide an M90 spring in the box, and installing this reduces the muzzle
velocity to around 310 FPS.
I rechrono’d at 308 FPS. It is fully compatible with LiPo and LiFe batteries,
one of which comes in the box so it’s ready to go.
How does it feel/perform
on the field? Well, it certainly feels sturdy and the build quality is solid.
It has a snappy fire selector and a good trigger response. On semi-auto it was
consistent and the range was good. Full auto was pretty fun, and it had a good
grouping.
In the box
you get: the SA Core replica, a 300 round high cap magazine,
RIS rail covers, tactical forward grip, an additional main spring, battery
& charger.
The whole package
retails for €133,25 which at the current exchange rate is around
£118.65. I’m really impressed with the price point of this model as it’s really
affordable, and great value especially considering the extras you get in the
box including the battery, charger and foregrip. It’s the complete package
which is especially handy for new players and not to mention tough. I am really pleasantly surprised with
this model in the Specna Arms CORE™
range.
I’m back with another review for Valken and this
time we’re looking at the Valken Zulu Gloves! The Valken Tactical Zulu Glove is Valken’s most popular glove in their line of hand protection and it
boasts a whole range of features that promote comfort and utility, as well as protection. The Zulu glove offers the end user a balance of comfort and
protection for shooting activities ranging from airsoft, to paintball.
The Zulu gloves are made of a breathable material that
is not only lightweight and durable but also comfortable. To maximise the
comfort for the user the gloves have kevlar covered hardshell knuckles to
protect not just against BB/paintball hits but scrapes and scuffs to your knuckles whilst
playing as well which is a great feature because we all know that knuckle shots
absolutely suck! The hardshell knuckles are really thick and substantial, the
gloves also have some rubber and thicker fabric along the fingers which
compliments the hardshell knuckles and offers extra protection for the fingers
as well.
As for extra features, it also has 4 way stretch articulated
joints on the small, ring, middle, and index fingers to allow for movement
whilst playing, a soft absorbing pad on the thumb for sweat – keeping those
hands dry, double stitched padding on the palm and silicon grip pads on the
upper palm and index finger. The silicon grip pads are a cool feature on the
glove because they give you more grip allowing for easier reloads, removing
mags from pouches etc.
How do they fit? Well most of you know that I have
very tiny hands and so for me finding gloves that fit has been a nightmare so I
was a little bit sceptical about trying out armoured gloves as I have tried armoured gloves before and they've absolutely drowned my hands – I put these on
and there weren't any major fit issues. I did find that the little finger of the glove was a little roomy but apart from that the small size gloves are a
pretty good size. The velcro closure adjustment helps keep the gloves
tight around the wrist and top of the hand so they aren’t baggy. I used these
for a woodland skirmish and found them to be comfortable, quick drying and
protected my hands from any hits well. Tan colourway also went well with my
MultiCam loadout which is a plus!
Are there
any improvements I would make? The only improvement I would make to the gloves
would be a lower profile hardshell knuckle for airsoft and a tinier pinky. I really like that they
offer so much protection but a more streamlined knuckle would in my opinion
improve the aesthetics and would eliminate the extra bulk/weight that is
unnecessary for an airsoft glove.
The Zulu
glove is available in Black, Olive and Tan. It’s also available in sizes S to a
2XL. As for price, the Zulu glove retails at $36.95 from Valken themselves
(which at the current exchange rate is around £28).
So today I wanted to
take a little time to tell you about the Valken Alliance from Valken Tactical!
The Valken Alliance
is a reward program for players around the world that want to support the Valken brand and are loyal customers. It gives you, the player a chance to be apart of a community of players and gives you access to some pretty cool opportunities and offers. Once
you’ve signed up to be part of the Alliance you get notified about Valken
sponsored events and access to the V.I.P tent, Alliance specific contests and
giveaways, receive periodical discount codes and special offers for Valken
products, be able to purchase Valken Alliance merchandise and you can even submit blog reviews
on products and get your work featured on the Alliance website!
There is more coming
to the site soon, including a video section where players can submit their
videos and get them featured, sponsorships and also a full list of international regions.
The Valken Alliance
is free to join, and has two membership options – basic which is free, or the
patch membership which costs $10 and includes a Valken patch.
So I’m
back with another review! I’ve teamed up with Military 1st to bring
you guys a short series of affordable plate carrier set ups for both tan and
green team uniforms and first on my list we are going to look/review the base
carrier for my first build, the well-known Flyye Swift Plate Carrier in MultiCam.
The Flyye Swift Plate Carrier is an adjustable, lightweight and low profile plate
carrier that has a similar look and functionality to the JPC plate carriers
that have become really popular amongst airsofters.The
plate carrier has a number of built in features including an integrated top
admin pouch with a velcro closing and three elastic loops inside the pocket,
the admin pouch is suitable for pistol mags, pens, chemlights and tonnes of
other useful bits and bobs that you would need to carry on the field. It also has three
integrated magazine pouches with loop velcro surface inside, elastic internal
dividers and removable shock cords with pull tabs for retention which are
suitable for both M4 and M16 magazines. At the top of the plate carrier just
above the integrated mag pouches it has a loop Velcro panel for patches (so
patchwhores, Flyye have you covered!).
As for its construction, it is made
of genuine Crye Precision MultiCam Invista 1000D Cordura Nylon material making
it extremely durable and water resistant for wet game days. Its laser-cut
Hypalon shoulder straps are extremely durable and make for a closer and more
comfortable fit. The stitching and general construction of the carrier is top
quality. The carrier comes with two soft armour plates at the front and back
included, and the plate compartments have velcro-secured flaps and pull
tabs at the bottom making them easy to insert and remove. The plates are a
little stiff at first due to their newness, but this is to be expected - after
a few game days the plates become a little bit more malleable which means they
sit better on the contours of your body. It has rectangles of durable mesh at the
inside top of the plate for ventilation and added comfort – this helps prevent
the carrier getting too sweaty on game days. It has sturdy webbing throughout
its construction for modular attachments. As it is a JPC style plate carrier it
is super lightweight, weighing just over 1.2kg including the soft armour plates
that are included, because of this I feel like it would be a really good piece
of kit for a MilSim or a weekend event where you end up wearing your plate
carrier for an extended period of time.
One of my favourite features of the
Flyye Swift plate carrier is the cummerbund made of PALS webbing – the webbing is
designed to help improve ventilation and provide extra carrying space for
additional magazine pouches and radio pouches etc. I have found in the past
that plate carriers with the PALS style of cummerbund have fit my body better
than standard cummerbunds. It is easy to put on and adjust – simply pull the front
of the vest up to reveal the Velcro fastening, which can be adjusted either at
the front or via the cord on the back of the plate carrier. Due to the small
size and adjustability of the carrier, I think it would be a great gear option
for women and younger players. The only issue I had with its adjustability is
that the shoulder straps fit really snug in their cover so it was a little bit
of a mission to adjust them, especially with long nails!
I really like the simple aesthetics
of the carrier, it’s sleek, low-profile and the integrated mag pouches give it
a tidy look but because of the molle on the integrated mag pouches you can add
extra pouches to add usability and of course beef it up. For a lightweight
loadout I paired this with my cobra shooters belt – super effective and
lightweight.
What’s the
retail price? The Flyye Swift plate carrier is available from Military 1stfor £137.95 for the MultiCam option and it is available in a wide variety of
camouflage patterns - MultiCam, black, coyote, A-TACS FG, ranger green, AOR1
and AOR2. It is worth noting that the price is dependent on the camo, some of
the camo options are a little less expensive. It is available in sizes small,
and all the way up to an extra-large with room for adjustment on all sizes of
the carrier so the size range is really inclusive. In regards to price I would
say that the Swift Plate Carrier is in the mid-price range, it definitely isn’t
the cheapest plate carrier that you can get your hands on but as it’s made of
genuine Crye Precision MultiCam you do have the peace of mind that the material
it’s made of is durable and the construction is good quality meaning it will last
you a good while! In fact knowing airsofters, you’d probably want a new loadout
before you wear one of these out.
I’ll be
using this carrier as the base of an affordable to mid-priced plate carrier set
up which will be featured in a YouTube video on the Femme Fatale Airsoft
YouTube channel so be sure to keep your eyes out for those which will be
uploaded towards the end of the month!
On Sunday 23rd July 2017, I took a drive into The
Black Country to visit a brand spanking new airsoft site ran by West Midlands
Airsoft called High Command. From where I’m based in the East Midlands, High
Command is around a 50 minute drive up the motorway depending on the traffic. The
site is situated within an industrial estate that’s tucked into a small
suburban housing estate in the heart of Rowley Regis. Despite its unlikely
location the industrial estate and the site itself is clearly signposted from
the road to make it easier to find.
As you follow the signs into the estate and drive into the
car park to the site there is around 20 car parking spaces so it’s good to get
there early to bag yourself a space. The safe zone is a short walk up a flight
of stairs and is a central corridor with rooms branching off that are full of
tables and chairs for players to organise their kit, as there are stairs
leading to the safe zone you may want to pack lightly but the safe zone is a
spacious room even if you do fancy bringing the kitchen sink! The first room
houses the official onsite shop which is run by West Midlands Airsoft and
supported by Staffordshire Militaria that sells a variety of RIFs, ammo, pyro,
scopes, sites and plenty of accessories that you could need on the day!
The
site also has 2 other retailers’ onsite supporting their game day shenanigans,
which we’ll talk a little bit about now: the first supporting company is
SIXMIL.com who are an independent airsoft hire company that are based in
Staffordshire that offer a huge range of not only rental weapons but rental
loadouts too! From their Recon and ‘Ghost’ to Assault and ‘Tank’ predesigned
loadouts SIXMIL offer new/beginner players the chance to facilitate a variety
of play styles and looks without the hassle of getting all the gear themselves!
I love this concept as it helps new players feel more involved in the game! The
second supporting company is a retailer called Targetszone! Targetszone are a
retailer based in Birmingham that specialise in field sports equipment from
major brands including Armex, Anglo Arms and more but also have a large
selection of military surplus and airsoft gear.
The day starts with a comprehensive safety brief from the
owner Paul and his team of marshals. The site runs a limit of 350 FPS max, semi
auto only (except in the odd game that are agreed by all players before
starting), and with a pyro limit of a 12 gauge magflash round however due to
the amount of wood in the building strike-able pyro is not allowed.
The site itself is a 13,000 sq ft warehouse space that is
set on the second floor of the building. It is a mixture of bright long, open
areas, dark corridors and even darker kill house style rooms. It is
exceptionally close CQB and with no minimum engagement distance you can bet it
is intense. The staff are constantly working to improve the site so it changes
from week to week with new rooms being added, new doors and more permanent
structures being built.
What about gameplay? The games are capped at 30 players
– 15 a side and that is a perfect amount for the sites total playing area of
13,000 sq ft. The game modes played are varied to include death matches and
objective based game modes that keep the day fresh. We started the day off with
a collapse and defend game to balance the teams which was then switched around.
Other games during the day included an objective game where teams fought to
dominate the killhouse to activate the target system and eliminate as many
targets as possible in 30 seconds. At the end of the day, we also played a
super fun VIP evacuation game where the VIP is given a force of 6 bodyguards to
enable them to move through the site and reach the evacuation point but there
was a catch, the VIP got to use the new Classic Army Mini Gun on a two second
burst for suppressive fire (of course all players agreed before game on and the
mini gun was used by an experienced, trusted player) Everyone had a great day and
the feedback from the games was excellent.
I have always said that one aspect of a site that is really
important to me personally is the staff – this can sometimes make or break a
site! The hospitality that I was shown from Paul, Kelly, Rob, Joe and the rest
of the staff onsite was second to none. They were all super friendly and
chatted enthusiastically with all of their customers throughout the day. The
marshals had a great sense of humour during gameplay and this added to the
atmosphere. One thing that impressed me during the day was that Paul was
consistently checking with his customers whether they were having a good day
and asking if there was anything that could be improved – this shows me that he
is not only passionate about his site but that the customers experience is
paramount!
So what’s the walk on fee? The walk on fee for members is £25.00
and for none-members is £30.00 each including a hot lunch (which is a rarity at
sites nowadays!) Hires are available from SIXMIL starting at £25 so it is in
line with game day fees at other sites.
Are there any issues with the site? There are only a couple
of issues that I noticed whist on site and they are issues that are isolated to
other tenants of the building. The site has 26 allocated car parking spaces
however a few of them are taken up by abandoned cars – whilst it doesn’t cause
a massive problem, it is a little bit of an annoyance. The other issue lies
with the men’s toilets - other tenants in the building unfortunately do not
look after the facilities so West Midlands Airsoft has combatted this however by
opening up the women’s toilet that has a lock on it, players and attendees of
the day can ask at reception for the key to enjoy a pleasant, clean bathroom.
Props to West Mids for taking such positive action regarding this!
Overall I had an absolutely fantastic day at West Midlands
Airsoft High Command, the site itself although not the biggest site is well
laid out and the gameplay flowed well. The games that were played were varied
and balanced. The players, marshals and staff were fun and enthusiastic to be
around and made everyone feel welcome! I’ll definitely be back!
Hardwick, K. (2017). West Midlands Airsoft: High Command. Airsoft Action. 79 (October), 42-43.
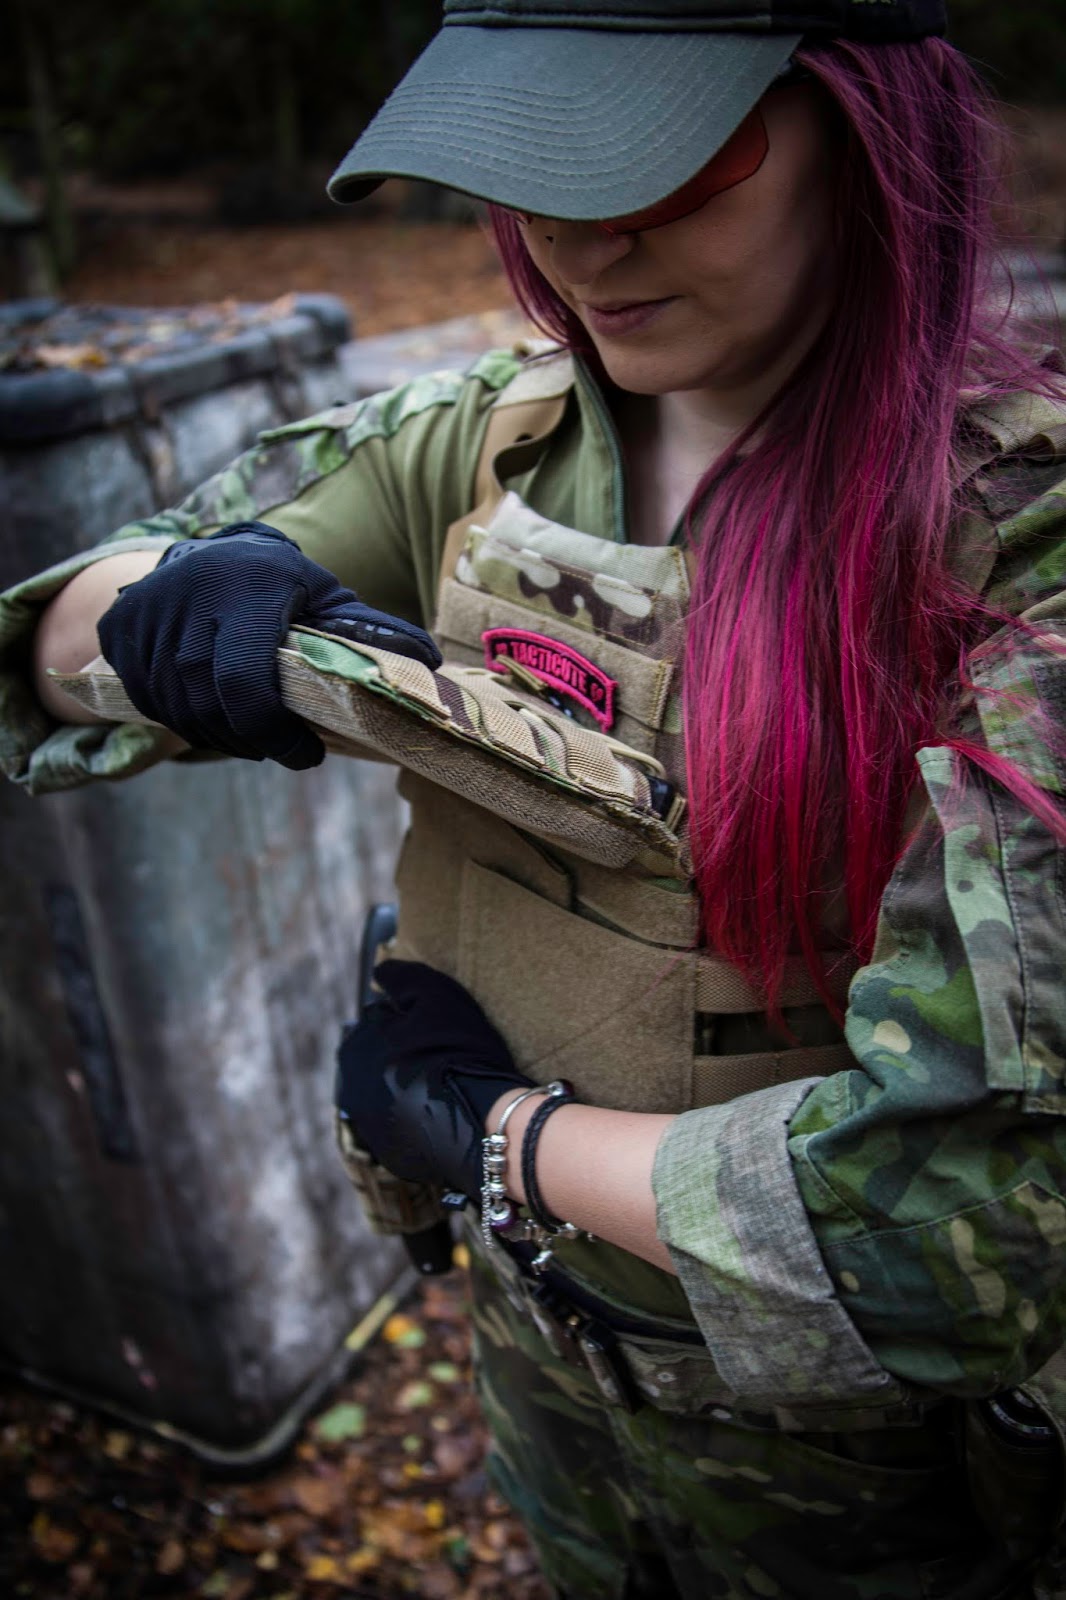
I’m back
with another review for Valken and this time it’s on the Valken Battle Belt LC
in Olive Drab! The Valken battle belt is a lightweight, low profile, padded,
laser cut molle battle belt option for players looking for an affordable
solution to carrying their kit in both skirmish and MilSim games, whether you
need an additional load bearing system to wear with your plate carrier or chest
rig or to run as a solo belt setup it’s a versatile option.
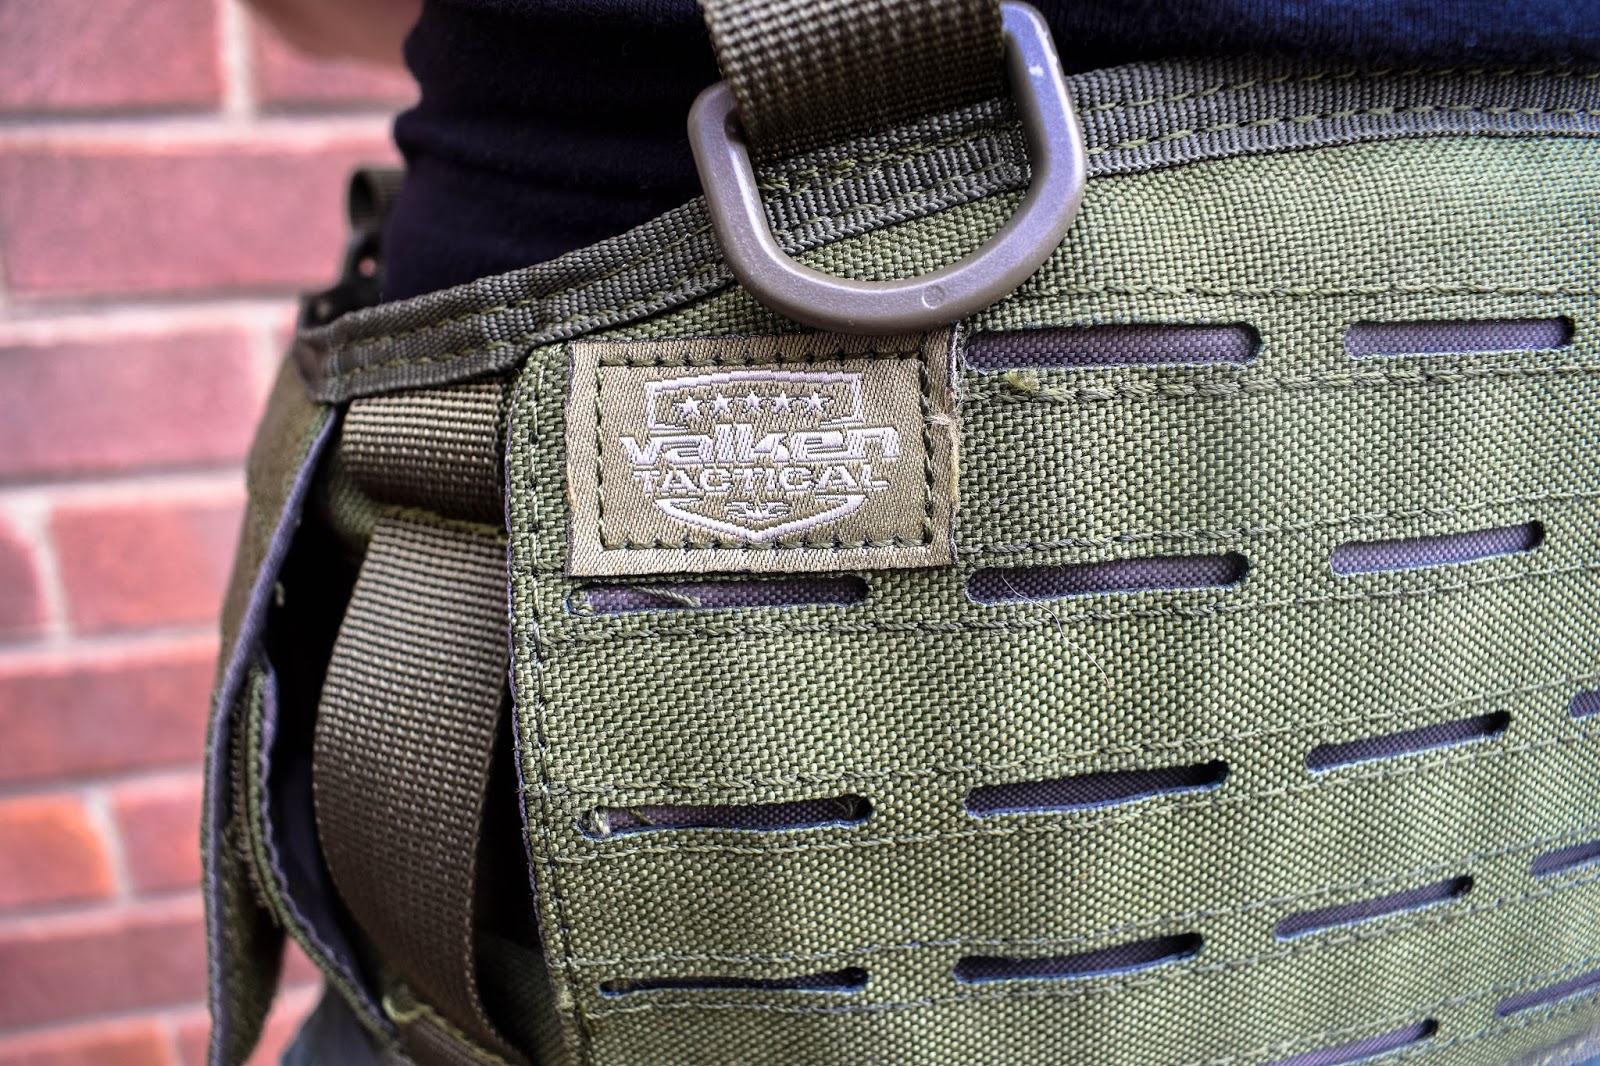
The battle belt LC is different to traditional
molle battle belts as it has rear and side laser cut molle attachment points,
and what I really like about laser cut molle is that it has a really sleek and
modern look. It is also easy enough to thread traditional molle platform
pouches through the laser cut points. Besides the laser cut molle, the belt
also has some really useful features: It has a really simple web belt threading
system and even includes the web belt. It also features front and back D-ring
mounting points for harnesses just in case you need some extra support when
running heavy pouches and kit (or just if you want to ensure that the belt
doesn’t move around too much during a gameday). The Left and right drop leg
attachment pass-throughs also make it a versatile piece for both left and right
handed shooters.
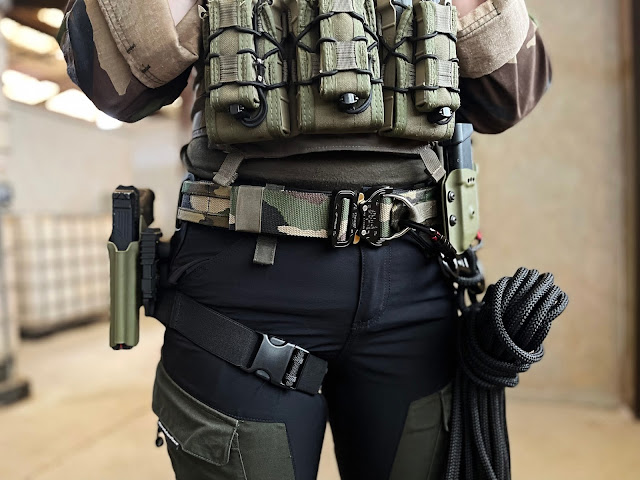
So how does it fit? I have the belt in medium and
it was easy to adjust/fit to my body and thanks to the air mesh inner padding,
the belt is really comfortable on my hips. The padding is also segmented which
means it fits the contours of the body really well. One issue I have found with
a lot of battle belts in the past is as I have lost weight they became really
uncomfortable on my hip bones and could sometimes leave me with bruises if I
wore them fully loaded and for extended periods of time (such as a 36 hour
MilSim), I haven’t yet had this issue with the battle belt LC whilst it’s been
fully loaded for a full game day but I am yet to wear it for a MilSim!
Are there any product improvements I would make?
Yes, the only real improvement I would make to the Valken battle belt LC would
be a higher quality buckle, although there is nothing wrong with the buckle it
has, I prefer chunky, thick buckles so I’m super sure that they won’t get
damaged by a stray BB.
The battle belt is available in 3 sizes – medium, large, XL and also in 3
different colours – black, olive and tan! I chose the olive drab colour way as
I’ve been building a green PMC inspired loadout for MilSims and this fits the
bill. The belt is (in my opinion) also super affordable at $29.95 (around £22
at the current exchange rate) available from Valken themselves here. Overall, I like
it. I'll be doing a battle belt set up with this bit of kit at a later date!
Post sponsored by Valken Tactical
Photography thanks to Silent Kitty Photography
Hey everyone! So I get a lot of questions about my time spent in the States, and MilSim West: Objective Stavropol is always a topic of conversation! When I was asked this weekend about it I remembered, I hadn't posted the blog post of MSW so here it is!
On the 26th April 2017 myself, Unicorn Leah and Jet Desertfox flew from Ontario, California to San Jose, CA and then finally onto Seattle, Washington for the next instalment of MilSim West. As many of you will know from watching Leah and Jet's social media feeds that they are avid MilSim West fans and they took me along to pop my MilSim West cherry. We arrived in Washington a little early - a couple of days in fact so we had a few days to chill before the game. On our first night we visited the 'Rep House' to hang out with the Rushing Russians. After our stay at the Rep House we made the enormous drive from Seattle to our next stop - an Airbnb in Centreville which was around 5 hours away via car. On the drive through it seemed like we drove through every season/every terrain - from the snowy mountains to the rolling green hills. Washington is absolutely gorgeous. We arrived at the Cadre house in the afternoon and set about relaxing before the event. We left for the op location at 12pm the next day.
Once we arrived at the op location after a short 30 minute drive and we started to get kitted up and reshuffled our rucks ready, whilst we were getting our gear sorted we met up with the rest of our section which included Omar from Enola Gaye, PNW Punk, Dayton from The House Gamers, Poi and Lupe who is behind the IG account Slayerella. We spent the next few hours chatting, preparing our kit and eating in the barn waiting for the game to kick off later that evening.
At 7pm our briefing began, the Russian and Militia Cadre briefed us on what the next 36 hours would entail, the AO and the mission we had to undertake - remove NATO forces from the area, by any means necessary. They then made sure we had everything we would need - we had to lay out all of our kit and show our Cadre that we had everything on the tacsop document. Due to the testing nature of these games it is super important that everyone is prepared to prevent discomfort and injury.
At sunset, all Russian and Militia forces organised into their sections and mobilised, we slung on our rucks and started walking in formation to our first FOB which was around 1 mile into AO, the walk took us around 20-30 minutes. I've never had to ruck anywhere before so this was a completely new experience for me, it was tough going but we all completed the walk.
It was almost pitch black when we arrived at our Militia FOB location so it was pretty tough going with uneven ground from rabbit warrens, debris from fallen trees and rocks protruding from the ground. When we got to our location we set up a defensive perimeter as our squads prepared their kit for the night. Militia HQ squad went out on a raid during the early hours of the morning and for Lupe (@slayerella) and I, it was time for STAG duties. We were on STAG for around 3-4 hours, we positioned ourselves amongst a mound of debris from a fallen tree and stared into the night with our weapons raised ready to engage any NATO that entered our FOB. Temperatures dropped pretty quickly Friday evening from a lovely 10 degrees celcius to around 1 degree at 3am.
I have been to Ops in the UK where it has been cold as fuck mixed with rain but nothing quite prepared me for MilSim West. Our Op location was opposite Mount Rainier, so we had a deathly cold wind blowing in from the mountain along with the low temperatures. Shortly after 3 am, myself and Lupe made the decision to get in our sleeping bags, despite both of us wearing cold weather gear and wrapping a sleeping bag around us on whilst we were keeping watch, we were both shivering. That night I barely slept, it was so cold as we had no shelter to shield us from the wind and sleeping out in the woods.
During the night, our Militia section hit 2 NATO patrols during the raids and returned at 4am. At around 8am whilst we were preparing for the day we were informed that enemy platoons were on their way to our location so we all threw our tac kit on ready for a scrap. One thing about MilSims is the pace of play can be slow at times and after around 20 minutes of waiting NATO troops to descend on our defensive positions, we decided to take the fight to them.
Militia HQ taking orders from Space Commander General Jet
We walked out of the FOB in the cold, brisk morning air and started closing the gap between our position and the NATO FOB. Jet took a small team ahead with him to their position, leaving myself and a few others to maintain a defensive line.
Dayton in a defensive position
Waiting
Our scout squad returned after around 15 minutes with details of the NATO FOB location and orders to attack their base, orders were sent out over the radios for the Militia call signs to join us at our location so we could launch an attack.
As our Militia call signs arrived at our location we started moving out towards the NATO FOB, as our other call signs flanked left to get the drop on NATO, Militia HQ and Honour guard squads walked across the open fields hooking right to distract and divert their attention. As we approached their position we popped smoke grenade upon smoke grenade to cloud their vision and our blank fire squad disorientated them with a barrage of shots.
Once in range we started engaging the NATO troops, taking out those that we could, popping smoke and medicing our squad members that had been hit in the advance. On our advance my gun failed meaning I was unable to engage anyone, so I instead supported the rest if our squad by throwing pyro and medicing those who needed it.
We had distracted the NATO players so well with our right advance that it gave our Militia call signs on the left enough time to infiltrate their base without being heard or seen. Once we had call signs in the FOB, we took out their troops and gained ground quickly. Once the FOB was cleared of enemies we started to search their bodies for intel and ammo - once located we moved this outside their base so we could load it into our vehicles that were en route to our location.
Searching bodies
'Vape nation'
After the attack on NATO we walked back to our FOB and started packing our gear up into our transport vehicles to take us to the Russian FOB on the other side of the base. When we arrived we started making a shelter for the night to come. Whilst I collected dried, dead leaves to lay on the ground of the shelter, Dayton and Poi dug the ground out from behind a pre-existing barricade.
The night for the HQ squad was spent refuelling on food and sitting by the fire. Russian and Militia forces were out at all hours of the night, hitting the NATO FOB on the hour, every hour.
At around 5am, there were shots fired into the Russian FOB, a small group of NATO soldiers had managed to evade all of our patrols. We woke up to pyro being thrown, shouting and guns being discharged. Our squad member Poi exploded out of bed and into action, throwing our rifles to us before he ran out into the darkness from where the shots were coming from.
We sat up in bed, clutching at our rifles, listening intently to determine where the shots were coming from and how close they were. BBs started hitting the tarpaulin of our shelter narrowly missing us so we hunkered down. After around 5 minutes, the shots ceased.
We were up early, at around 7am. Militia and Russian troops were still out fighting against NATO. We started packing our camp away and reorganising our kit in anticipation for the very last assault. The last assaults at MilSim West are somewhat legendary!
The last battle came an hour before the Op was due to finish. At 10am, a wave of NATO forces pushed their way from the treeline into the Militia/Russian FOB. As I was sat by the fire digging a tick out of my arm, we heard shouting and weapons being discharged so we stopped what we were doing, picked up our weapons and started running towards where the shots were coming from. Once we got into the tree line we saw our Russian brothers and sisters getting stuck in. The engagement lasted around an hour with mortars being dropped, smoke and pyro being thrown all over the shop and rounds whizzing past. The battle cries in russian added to the atmosphere.
I can honestly say, that MilSim West: Objective Stavropol was by far the hardest experience I've undertook in my 3 years of playing airsoft, from the cold to rucking all my kit, gun failures, sleeping rough outdoors it was an experience but after I embraced the suck, it was fucking awesome. I would fully recommend MilSim West to anyone looking to take their MilSim game to the next level. I also want to say a huge thank you to MilSim West for flying me out with Jet and Leah to take part in this awesome op.
Check out my gameplay video from the final battle at MilSim West: Objective Stavropol below: